AvSight Inventory Management
Creating and Maintaining Inventories
This article will cover manually creating new inventories and managing existing inventories.
Prerequisites | Information needed to complete the steps |
|---|---|
Creating Part Masters | Part Number |
Creating Condition Codes | Warehouse |
Creating Owner Codes | Warehouse Location |
Creating Warehouses | Condition Code |
Creating Warehouse Locations | Owner Code |
Warehouse Location | |
User Level: Beginner

In AvSight, Inventories provide the ability to maintain in-depth information about parts that is essential to the sales and purchasing processes. Each inventory contains information on one part number, however a single part may be contained in multiple inventories. For instance, part A-100 may be stocked as a new part, a re-manufactured part or a used part. A separate inventory is created for part A-100 for each of those conditions. Inventories can also be based on locations and owner codes. (See Related Articles below). Typically, inventories are created in AvSight during the receiving process or by importing from another source (See Related Articles below). In this article, we will review the basics of manually creating and maintaining inventories in the AvSight system.
Manually Creating an Inventory
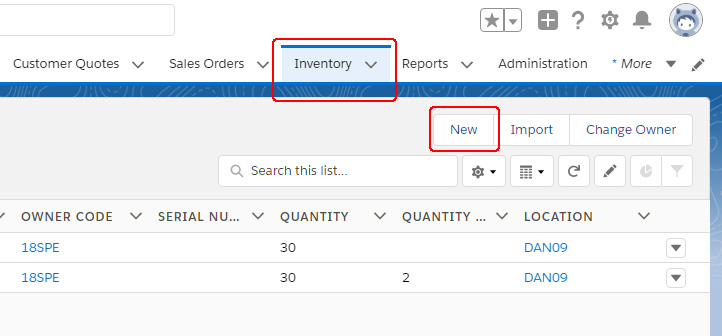
- Login to the AvSight system and navigate to Inventory in the AvSight Menu. On narrower resolution screens you may need to select the More tab and choose Inventory from the drop down list.
- By default, the Inventory screen defaults to Recently Viewed, to change this, select the drop down next to Recently Viewed and choose All. This will ensure an Inventory hasn’t already been set up.
- Select New from the menu on the right side of the Inventory screen and the New Inventory form will open.
- Required fields:
- Part Number
- Warehouse
- Location
- Condition Code
- Owner Code
- Required fields:
- Enter the required information and any additional desired information and click Save.
Managing Existing Inventories
To edit an existing inventory, simply click on the inventory name on the main inventory screen and click Edit to edit multiple fields or click the pencil icon to edit a single field.
Using Inventory Update
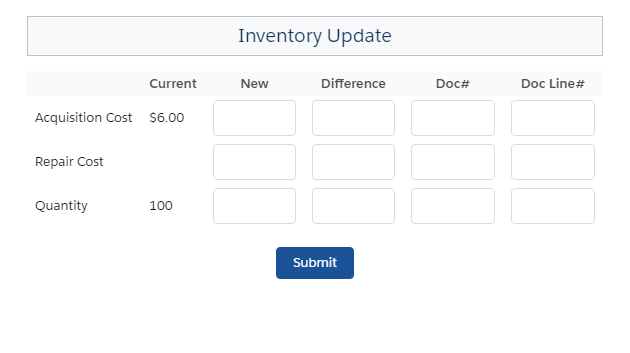
At times, inventories may need to be manually updated--inventory write offs, adjusting counts after a physical inventory or cycle counts, etc. IN AvSight, this is accomplished using the Inventory Update screen. To access the screen, open the inventory to be adjusted and select the Inventory Update button from the Quick Action menu.


Acquisition Costs This amount is automatically pulled from the document that originated the inventory, such as a PO, It can manually be adjusted here by entering a new value in the New column the Difference will automatically be calculated.
Repair Costs This amount is automatically pulled from any Repair Orders that are associated with the inventory, but may be manually adjusted here.
Quantity This amount is automatically adjusted by Sales Orders or Transfers, but can be manually adjusted here if necessary.
Doc#, Doc Line# These fields allow a document reference to be added to support the adjustment if needed.
Inventory Transfers
Inventory is assigned a location when it is created. However, at times it may need to be moved to a new location. In AvSight, this is accomplished with an Inventory Transfer and can be done for a single inventory or multiple inventories at once. To begin switch to the Operations module and select the Operations Tools tab. Select either the Bulk Inventory Transfer or Inventory Transfer as needed.
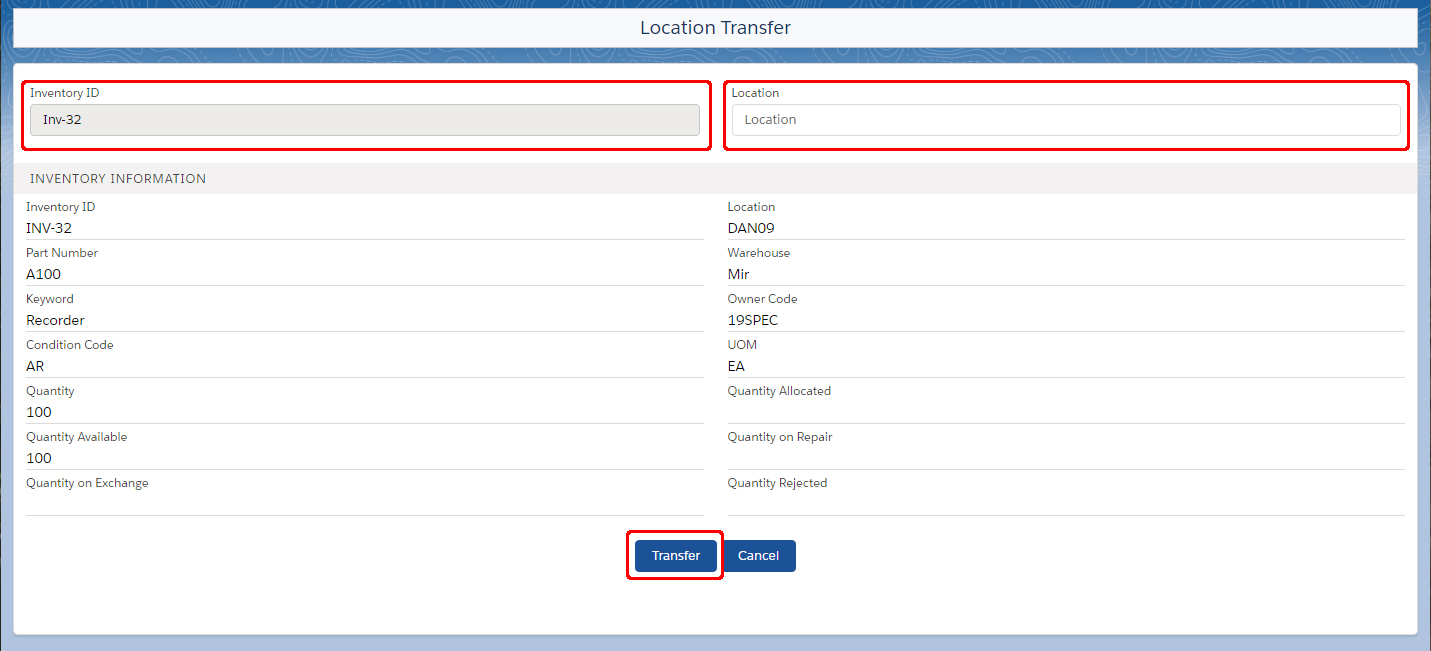
To perform a single Inventory Transfer, enter the inventory number to transfer in the Inventory ID field (a valid inventory is required since this field does not contain a type ahead feature) and press enter (or click the Location field) to view the details about the inventory. Verify the correct inventory is displayed, enter the new location and click Transfer.

Bulk Inventory Transfer

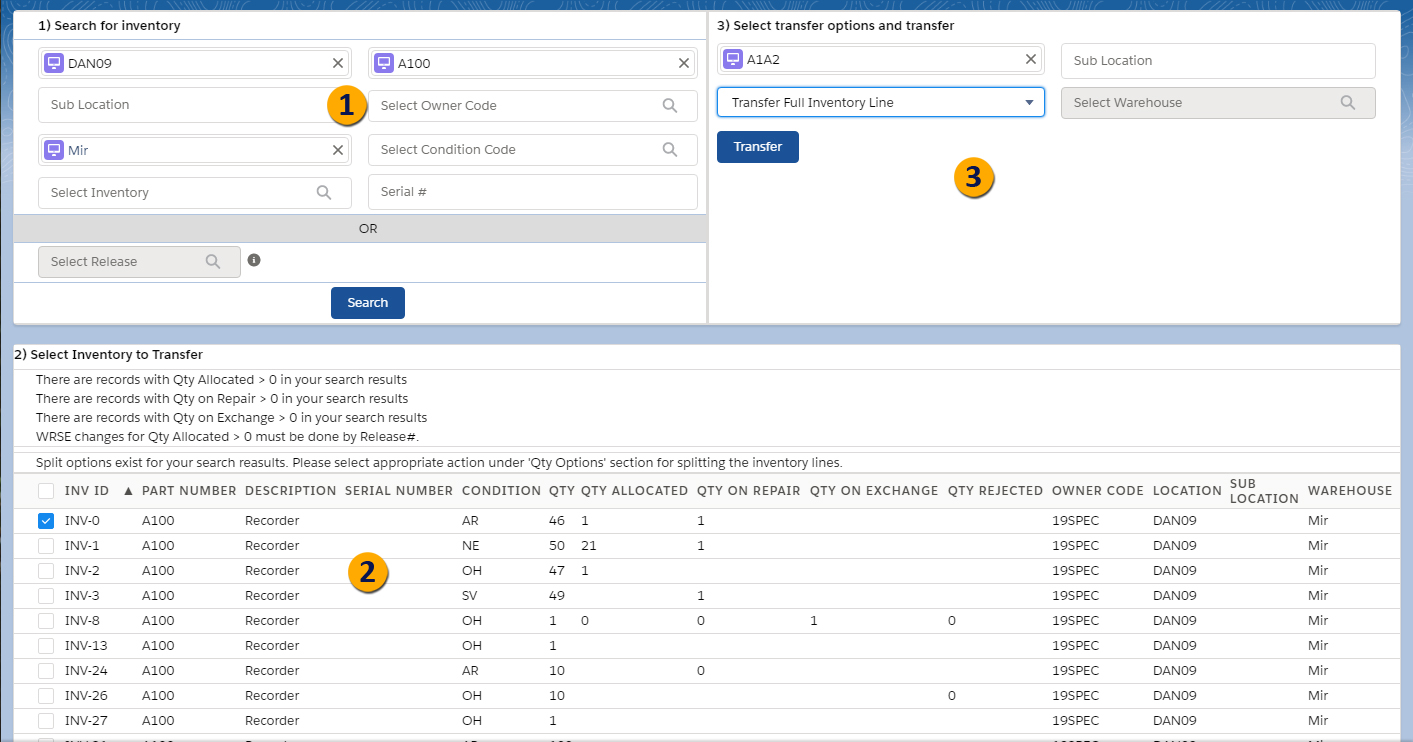
- 1Enter the search criteria. Multiple criteria may be added, but the results will be correspondingly narrower as more criteria are added. NOTE: if an inventory contains allocated items, the search must be conducted by Release number if it will be moved to a different warehouse.
- 2Select the inventories to be transferred.
- 3Enter the new location information and click Transfer.
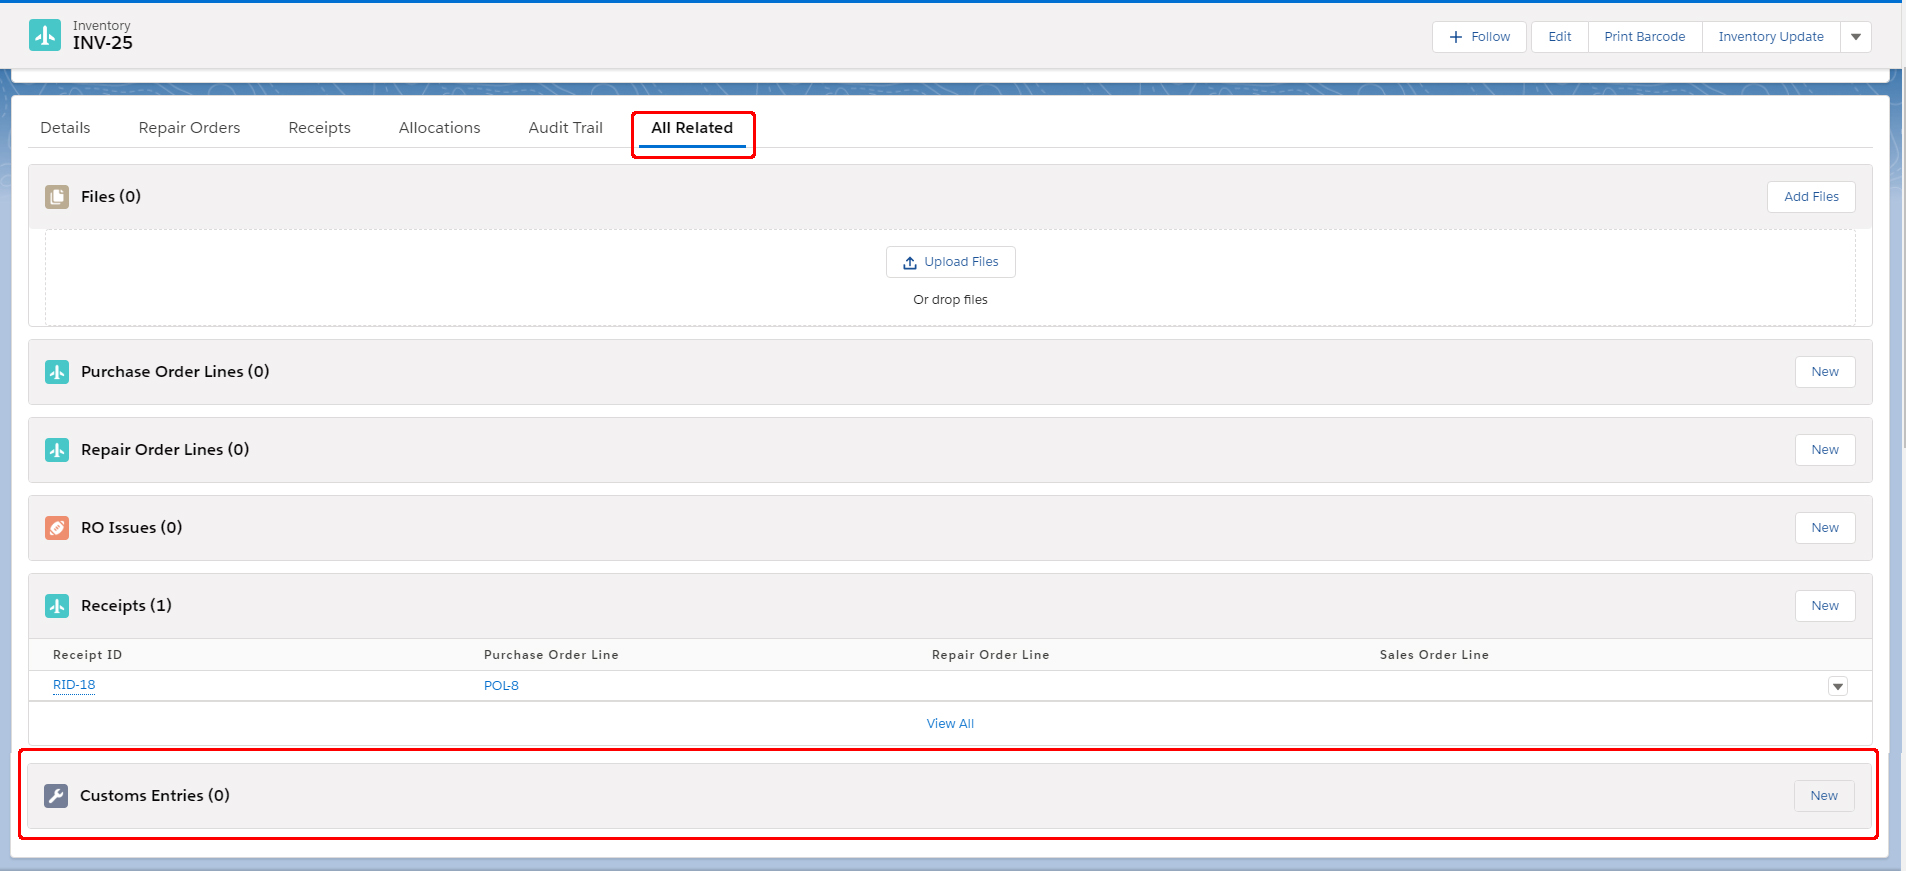
Customs Entry Tracking
AvSight provides a means to track important customs information on a per inventory basis. To enter customs information, open the desired inventory and select the All Related tab. Scroll to the Customs Entries section and click New to open the New Customs Entry screen. Enter the necessary information and click Save to complete the process.