AvSight Work Orders
EASA Form 1/8130-3 Options
This article will cover customizing user editable data in EASA Form 1 and FAA 8130-3.
Prerequisites: None
User Level: Intermediate
The AvSight Work Order module provides the functionality for generating the FAA 8130-3 and/or EASA Form 1 for approval to return to service. Both forms are dynamically created when generated during the work order process. Therefore it is important to understand where the data for the form comes from and what can be customized and what can’t. The following lists the form fields and the source of their data.
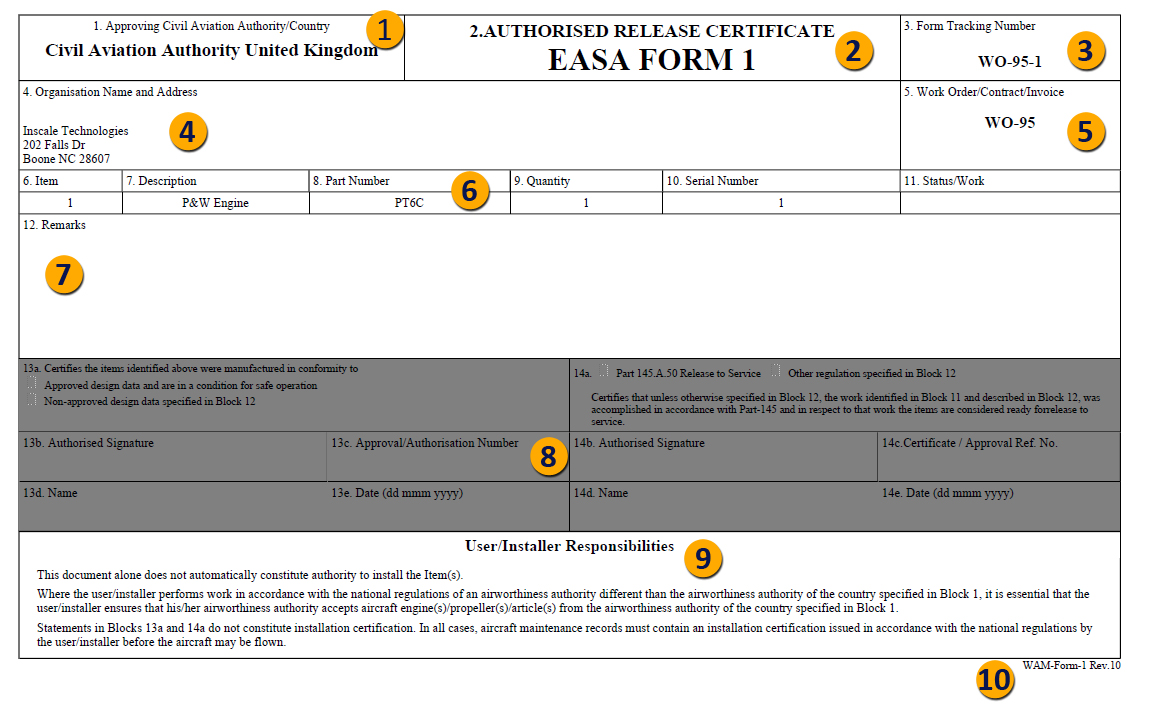
EASA Form 1


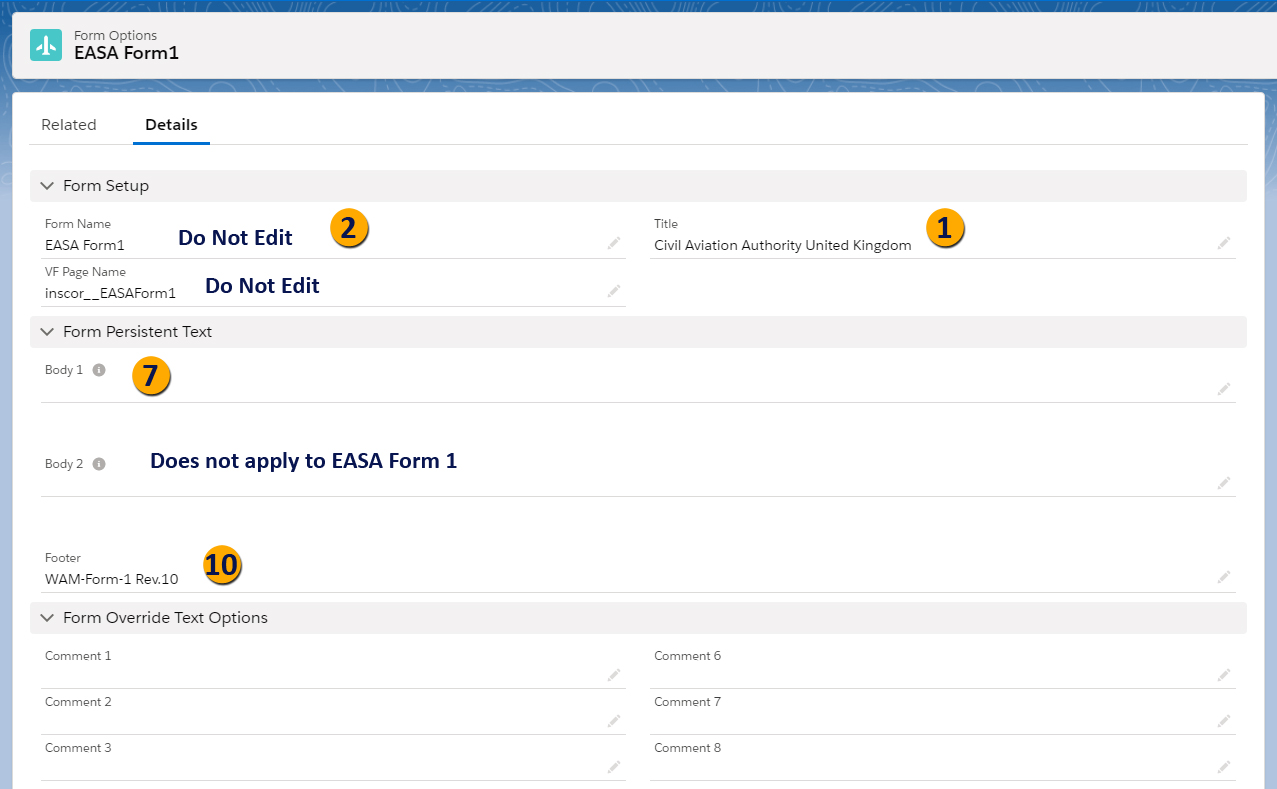
- 1This information is supplied by the Title field in Form Options and may be edited to add the appropriate government agency.
- 2This information is static on the form itself. The corresponding Form Name field in Form Options page is used by the system to determine the form to use. THIS FIELD SHOULD NOT BE EDITED. DOING SO WILL BREAK FUNCTIONALITY.
- 3This is a Unique identifier based on the Work Order Number and a number representing the revisions on the forms. Each saved version increases the revision number by one.
- 4This information comes from the Company Information screen in the Company Master. This will also include the company logo if set up in the Company Information.
- 5This information is automatically generated by the work order process.
- 6This information is automatically generated by the work order process.
- 7The Remarks area is filled in from various areas including the Work Order Release Statement and from the Body 1 Field in Forms Options and may be edited to suit the company’s needs.
- 8The header information in this area is static and cannot be changed. By default the fields are inactive, The appropriate side is enabled via the Override Screen, the name and signature is based on the user logged into the system, and the Certificate number comes from the employee or company setup.
- 9This area is static and cannot be edited.
- 10This information is supplied by the Footer Field in Forms Options and can be used to update the form revision information or other information if needed.
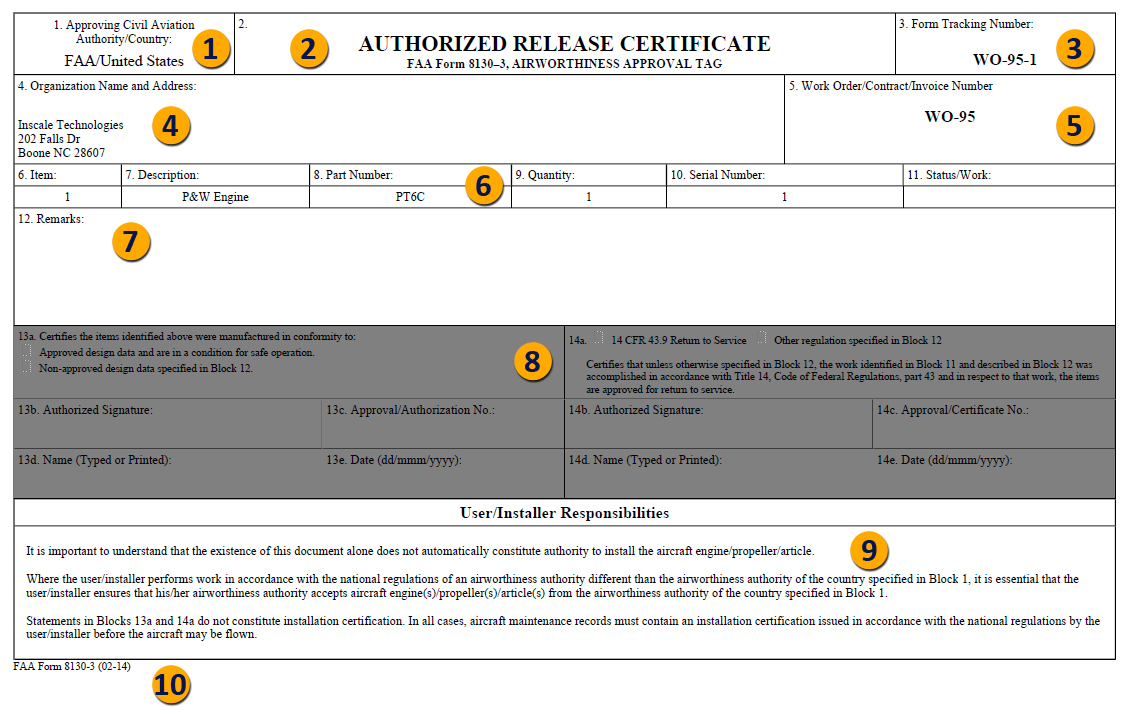
Form 8130-3
The information supplied to Form 8130-3 is similar to the EASA Form 1, but there are slight differences:


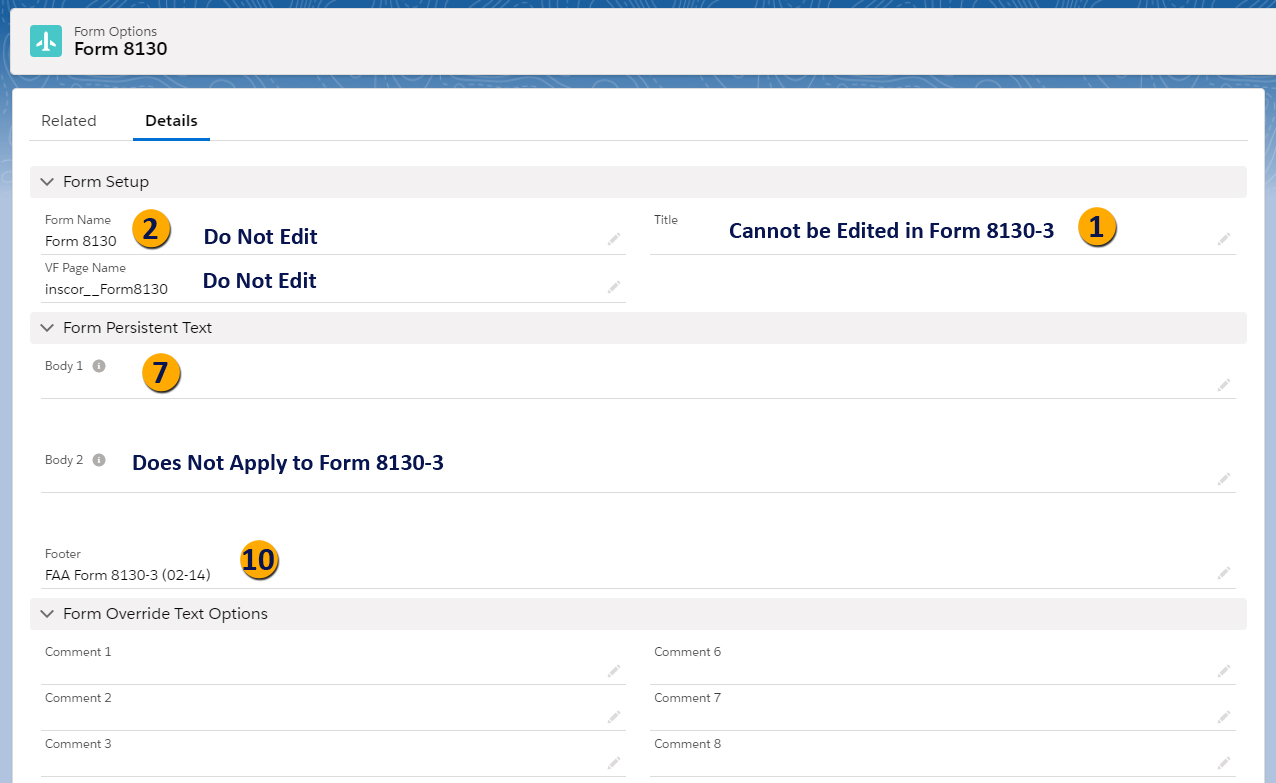
- 1This information is static and cannot be edited on the 8130-3 form.
- 2This information is static on the form itself. The corresponding Form Name field in Form Options page is used by the system to determine the form to use. THIS FIELD SHOULD NOT BE EDITED. DOING SO WILL BREAK FUNCTIONALITY.
- 3This is a Unique identifier based on the Work Order Number and a number representing the revisions on the forms. Each saved version increases the revision number by one.
- 4This information comes from the Company Information screen in the Company Master. This will also include the company logo if set up in the Company Information.
- 5This information is automatically generated by the work order process.
- 6This information is automatically generated by the work order process.
- 7The Remarks area is filled in from various areas including the Work Order Release Statement and from the Body 1 Field in Forms Options and may be edited to suit the company’s needs.
- 8The header information in this area is static and cannot be changed. By default the fields are inactive, The appropriate side is enabled via the Override Screen, the name and signature is based on the user logged into the system, and the Certificate number comes from the employee or company setup.
- 9This area is static and cannot be edited.
- 10This information is supplied by the Footer Field in Form Options and can be used to update the form revision information or other information if needed.
Editing Form Options
To edit fields that receive data from the Form Options screen, navigate to Administration > Master Tables > Form Options and either search for the form to be edited or select it from the list of forms in the list view. By default the list view is set to Recently Viewed. In order to see all forms click the down arrow and select All.
Select the Pencil Icon of the field to be edited, make the necessary changes and click Save.