AvSight Inventory Management
Working with Alternate IDs
This article will cover the basics of creating and importing Alternate ID relationships in the AvSight system.
Prerequisites: Creating Part Masters
Information needed to complete the steps:
Required | Optional |
|---|---|
Primary Part Number | Description |
Alternate Part Number | Authority |
Relationship | Description |
Some parts may have been replaced by a newer part or be interchangeable with another part. AvSight provides the ability to create a relationship between two parts to provide a possible alternative to a specific part. In this article we will create Alternate IDs in order to create a relationship between two or more existing parts
Creating an Alternate ID

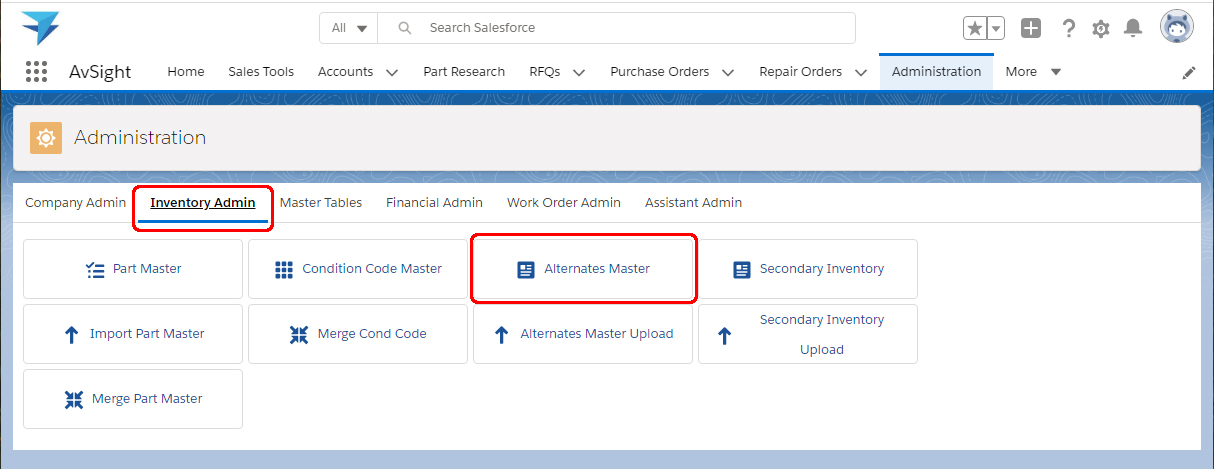
- Login to the AvSight system and Navigate to Administration on the right side of the AvSight Menu. On narrower resolution screens you may need to select the More tab and choose Administration from the drop down list.
- Select Inventory Admin in the Page Level Menu.
- Select the Alternates Master button to open the Alternates Master screen.
- By default, the Alternates Master screen defaults to Recently Viewed, to change this, select the drop down next to Recently Viewed and choose All. This will ensure an Alternate ID hasn’t already been set up.
- Select New from the menu on the right side of the Alternate ID Master screen and the New Alternate ID form will open.
- Required fields:
- Primary Part Number
- Alternate Part Number
- Relationship
- Enter the required information and any additional desired information and click Save.
Uploading Alternate IDs
Alternates Master Upload is located under Administration > Inventory Admin > Alternates Master Upload

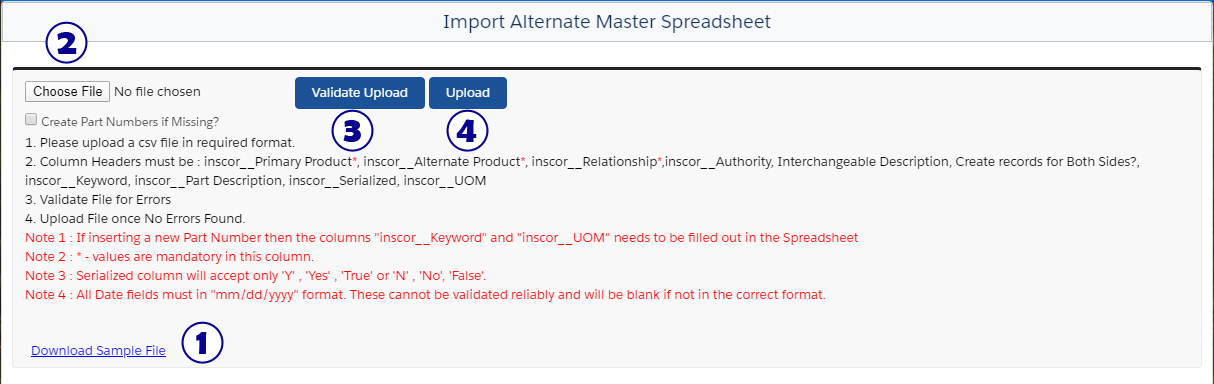
- 1Download the Sample File
- 2After editing the file as outlined below, upload it via Choose File
- 3Validate the file
- 4Upload the Secondary Inventory
The upload process requires the data to be imported be in the form of a Comma Separated Value file or CSV. This is a common file format that can be created with most spreadsheet applications like Excel. A template is provided to provide all the columns available and make the process easier for you. On the Import Spreadsheet screen, click “Download Sample File” near the bottom of the wording. The following columns are mandatory and must be included on the spreadsheet:
- Fields Required when Part Number already exists in your system
- inscor__Primary Part Number (your item’s part number)
- inscor__AlternateProduct (the part number of the alternate part)
- inscor__Relationship (IsInterchangeable, IsNOTinterchangeable or Superseded By)
- Fields Required when “Create Part Master” is needed for those part numbers that do not exist in your system
- inscor__Keyword (if creating a new part number this is required. If uploading an existing part number, this can be left blank. Max of 15 characters allowed)
- Inscor__UOM (valid UOM)
- Optional Fields
- inscor_Authority (entity that authorizes a part as interchangeable)
- Create records for Both Sides? (creates a Part Master and an Alternate ID--accepts yes or no)
- inscor_Keyword (provides a one word tag to facilitate searches)
Please note the following:
- Serialized column will accept only ‘Y’ , ‘Yes’ , ‘True’ or ‘N’ , ‘No’, ‘False’.
- It is helpful to perform a trial upload with one or two items to make sure the format is correct, before uploading large amounts of information.
- While large numbers of items can be imported at once, it is beneficial to limit the number of items to <1000 to prevent impacting the system for other users.
It’s important to remember that the column headers must have the same name as is shown on the sample file template.
Once you have the desired items in the correct format, click “Validate Upload” to have the system verify the information. If there are validation errors, correct the information. Anytime the file is changed, you must “Choose File” and validate again. Repeat this process until there are no errors displayed. Once the data is error free, click “Upload Inventory” to complete the process.