AvSight Inventory Management
Working with Purchase Orders
Information needed to complete the steps: | |
|---|---|
Required: | |
Vendor | Condition Code |
Part Number | Type of Purchase |
Not Necessary to complete the PO, but will be needed during the process: | |
Unit Price | Vendor Contact |
Owner Code | Quantity Requested |
Shipping Info | |
| |
Purchase Orders allow you to authorize the purchase of items from a vendor. In this article we will cover the process of creating and submitting a PO. There are two ways to create a PO—directly or by converting from an RFQ. Working with POs is a process that is integrated with many of the other parts of AvSight and will require information from other areas already covered in earlier articles. As with all of the AvSight screens this required information can be created while working within a related area, it highly recommended that you complete all of the previous articles under Administration, Inventory Management and Contact Management first.

Creating a PO
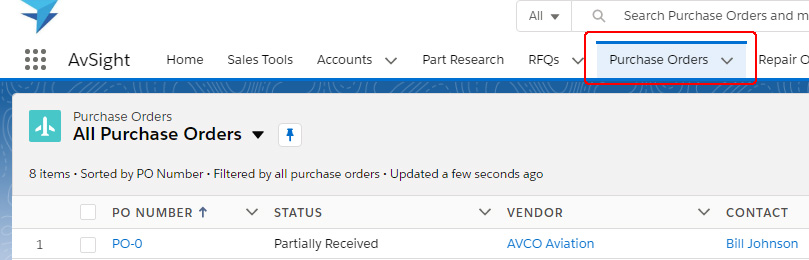
- Login to the AvSight system and navigate to Purchase Orders on the AvSight Menu. On narrower resolution screens you may need to select the More tab and choose Purchase Orders from the drop down list.
- Select New in the Site Level Menu.
- By default, the Purchase Orders screen defaults to Recently Viewed, to change this, select the drop down next to Recently Viewed and choose All. This will ensure a PO hasn’t already been created.
- Select New from the menu on the right side of the Purchase Orders screen and the New Purchase Order form will open.
- Required fields:
- Vendor
- While not required, the following fields will be helpful in completing the quote:
- Contact
- If left blank, the following fields will populate with system or account defaults:
- Ship To Location
- Ship Method
- Acct#
- Company
- Enter the required information and any additional desired information and click Save.
Creating a Drop-ship PO
It is also possible to have the items from a PO drop-shipped to another address. In the Shipping Information section of the PO header, leave the Ship To Location section blank and enter the account to receive the drop-shipment in the Dropship to Account along with any other need information.
Completing the PO Process

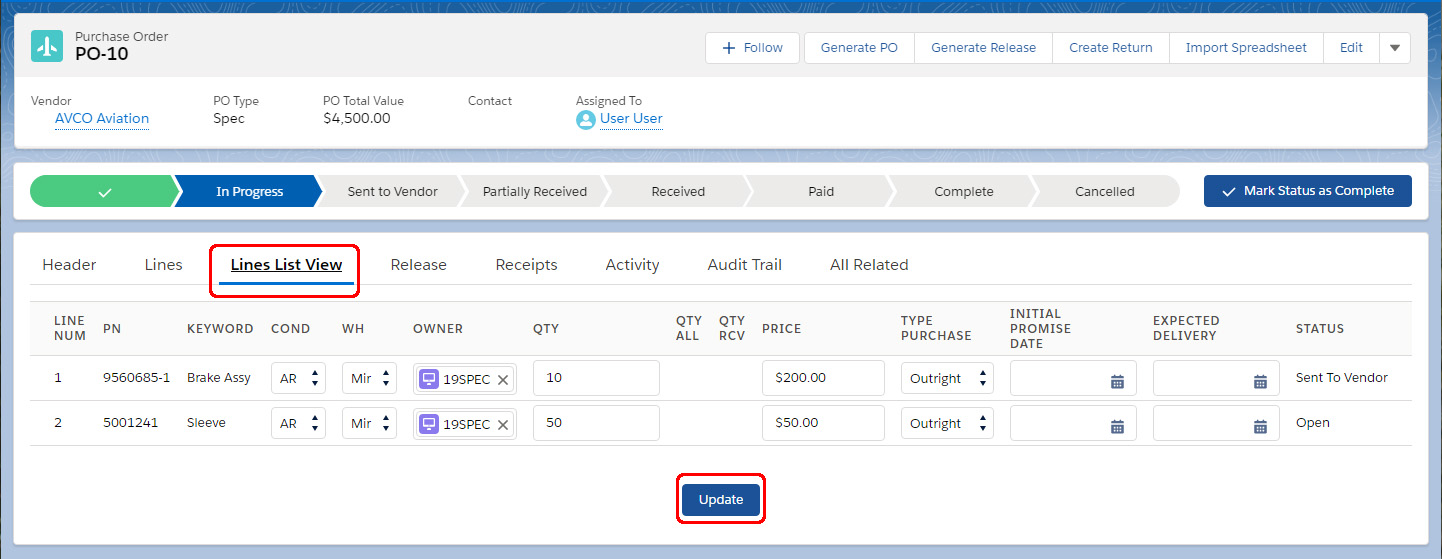
There are three navigational areas in the Purchase Order screen as illustrated above. Once a PO is saved, you are automatically taken to the next step of the process—Lines. This area will allow you to add line items to your PO. Please note: at any time in the process, the information from a previous step may be edited by simply clicking on the appropriate tab. Most of the screens in the process will allow you to enter comments as part of the process. Internal Comments will only appear in the AvSight system. External Comments will be printed on any correspondence with the vendor.
Adding a Line Item
On the Lines screen, click new from the page menu to open the New PO Line page. Not all of the fields on the line item screen are required to complete the PO, but at some time during the process, the information will be needed. If the information is available, it will save much work at a later time to enter it now. After completing the necessary information, click Save.
If additional line items are needed click New. After all line items have been entered, you may review and edit the information by selecting Lines List View tab.
Additional Tabs
Since the PO process is integrated with other areas of AvSight, the remaining tabs will allow you to assign a task or log a call (Activity), See any changes that have been made to the PO (Audit Trail), upload files or see any other information associated with the PO (All Related). Release and Receipts are populated during other operations and serve as links to those records.
Generating the PO
At this point a PO can be generated. From the Quick Actions menu, Click Generate PO. This will open a dialogue box to allow the PO to be sent to the vendor for processing. If a contact was specified in the Header section, that email address will be pre-filled in the form. Complete any other information you would like to include in the email and click Send. An entry will be placed in the activity tab indicating that an email was sent to the vendor. Once the PO has been generated, it will now be available to Receiving.
Creating a PO from an RFQ.
Once an RFQ has been received and approved, it can be very simply be used as the basis of a PO. Open the RFQ and from the Quick Actions menu, select Convert to PO. This will open the Convert to Purchase Order dialogue box and allow you to choose the items to add to the PO and quantities to be purchase. Click Convert to convert the RFQ and open the new PO for further processing. The rest of the procedure will follow the steps outlined above.
Mass Updating a PO
Updating multiple lines of a PO can be accomplished in the Lines List View. Select the Lines List View tab of the PO, make any necessary changes and click Update.

Paying a PO
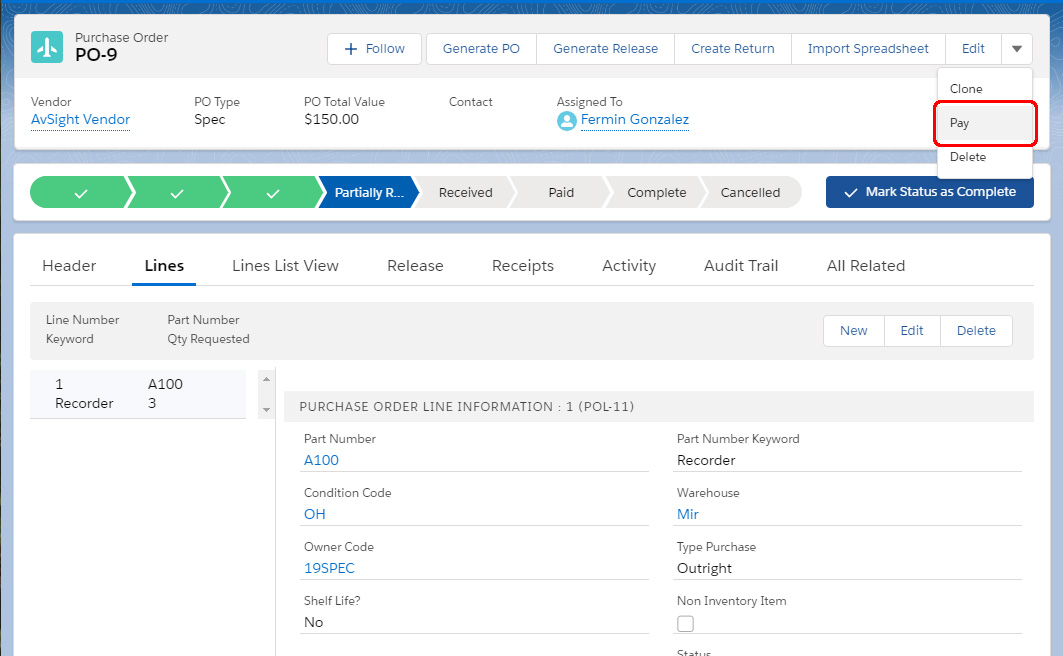
After the shipment has been received from the vendor, the PO must be approved for payment. Open the PO and click Pay from the page menu.


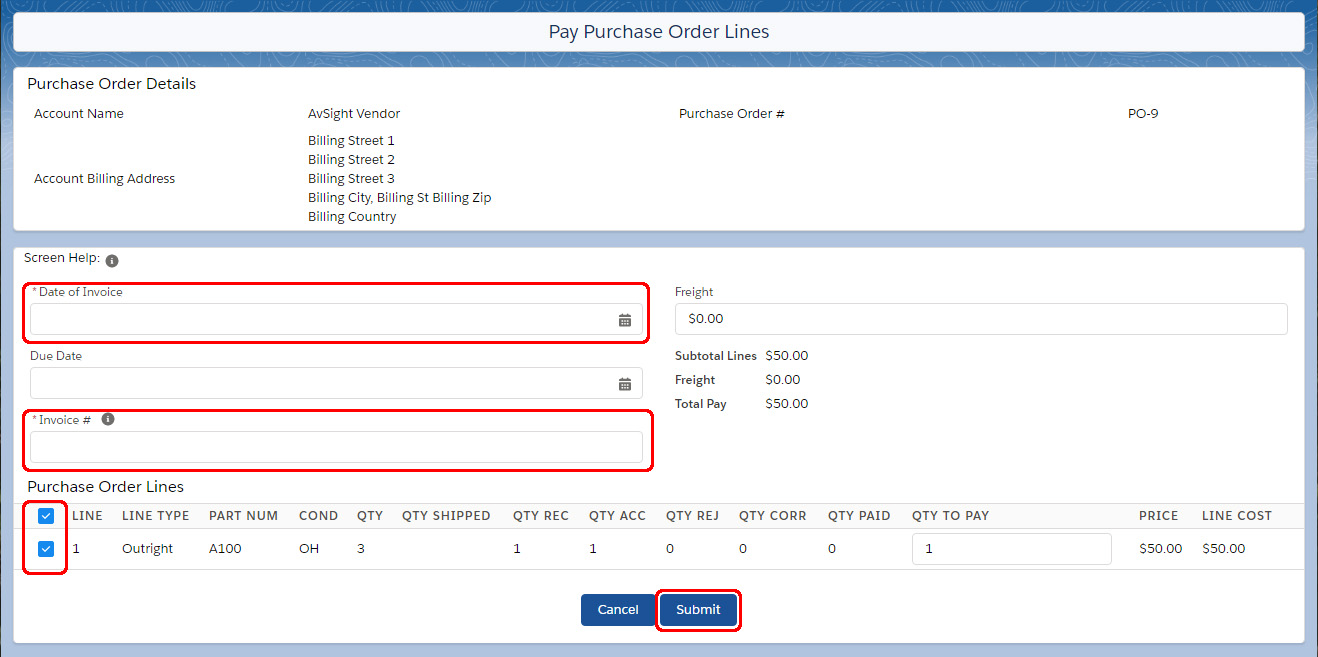
Select which PO Lines are to be paid and enter the Invoice Date and Invoice #, the QTY TO PAY and click Submit to authorize accounting to pay the invoice associated with the PO.