AvSight Administration
Working with Warehouses and Locations
This article will cover the basics of creating Warehouses and Warehouse Locations.
Prerequisites: Creating and Managing Companies
User Level: Beginner
Information required to complete the steps: Company Location ID
AvSight uses 3 main factors when defining where parts are kept.
- Company Locations defines a physical address/location of where parts may be shipped to and stored.
- Warehouses can be a physical or virtual representations of where those parts are kept. The use of Warehouses allows adding an additional dimension for categorizing or controlling parts within a physical Company Location.
- Warehouse Locations are the actual bin locations or shelf name of where the parts are kept. Normally these bin locations contain a Row and Shelf component (Row-A1, Shelf-A2 = A1A2) or a general area (Receiving Dock, Cross Sales Staging, Pick Up Area) but must be defined as being at a physical Company Location.
For Example:
Parts are normally kept at the main warehouse at corporate headquarters in Miami. The normal Warehouse Name for the headquarters may be designated as "Main Warehouse" and use a Warehouse Code of "M". If some parts must be kept segregated within the main warehouse for reasons, such as hazardous material or export controlled material, these could be kept in virtual warehouses called "MH" or "ME" for "Main Hazardous" or "Main Export Controlled". The parts would be kept at Warehouse Locations that normally desiginate the row, shelf, and general location such as bin Row-A1, Shelf-A2 (A1A2) that would be physically identified as being at Corporate Headquarters.
Part | Warehouse | Warehouse Location | Company Location |
|---|---|---|---|
Solvent | MH | A1A2 | Miami |
Radar | ME | A2B4 | Miami |
Bolt | M | A1C1 | Miami |
Creating a Warehouse

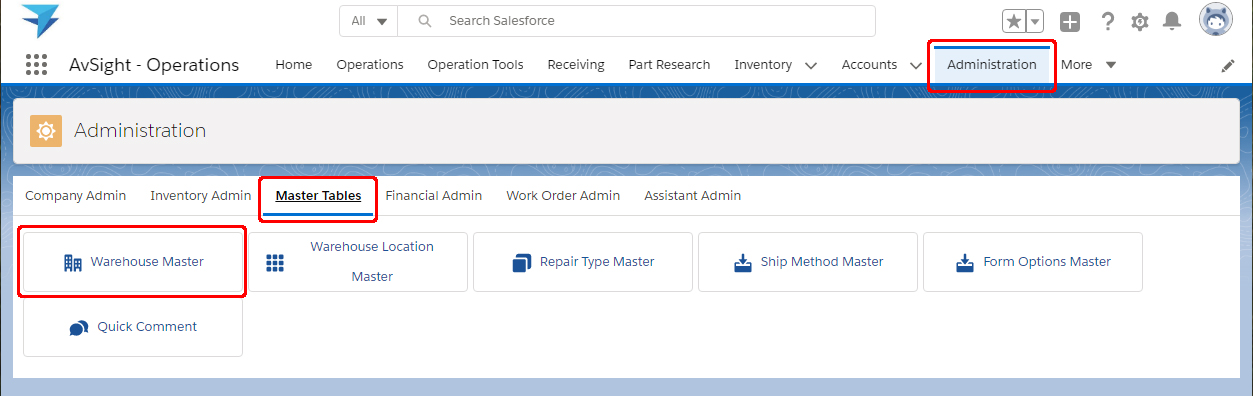
To create a new Warehouse, click the Administration tab of the AvSight menu—Note: On narrower resolution screens, it may be necessary to select More and then choose Administration from the resulting list—then select Mater Tables and Warehouse Master to open the Warehouse Master List View. The list view by default opens in Recently Viewed mode. Select the down arrow and select All to view the entire list of warehouses. This will ensure a warehouse by the same name has not already been set up.

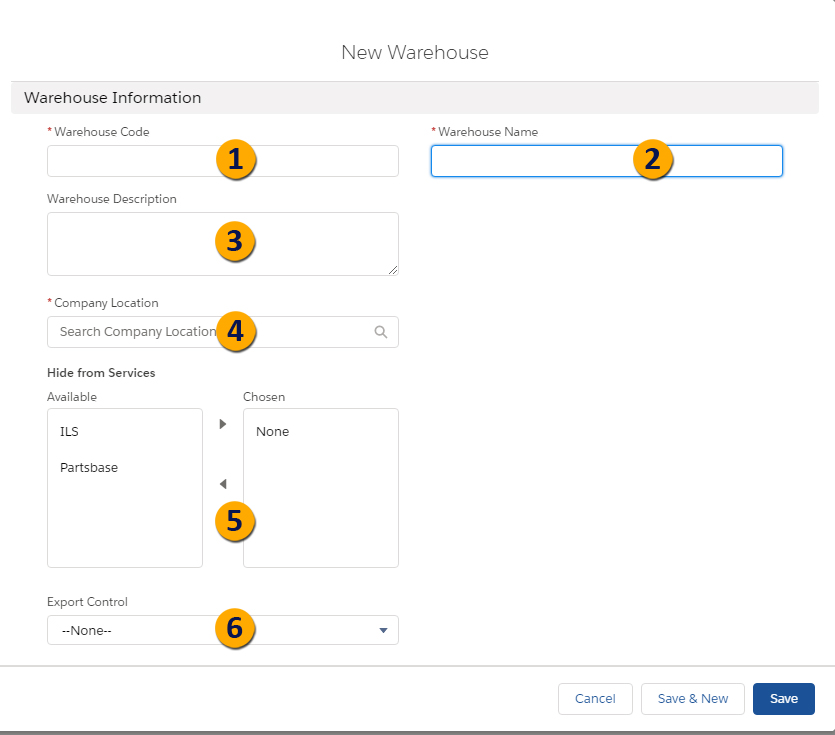
- 1Warehouse Code a short code to identify the warehouse on forms. Maximum length is 6 characters
- 2Warehouse Name This field provides a human readable name for the warehouse.
- 3Warehouse Description This field provides a meaningful description of the warehouse to help identify it.
- 4Company Location The company location where the warehouse is located.
- 5Hide from Services Determines whether inventory stored in this warehouse will be visible in online services such as ILS or Partsbase.
- 6Export Control Determines if inventory stored in this warehouse will be restricted from being exported. (See Related Articles)
Creating a Warehouse Location

To create a new Warehouse Location, click the Administration tab of the AvSight menu—Note: On narrower resolution screens, it may be necessary to select More and then choose Administration from the resulting list—then select Mater Tables and Warehouse Location Master to open the Warehouse Location Master List View. The list view by default opens in Recently Viewed mode. Select the down arrow and select All to view the entire list of warehouse locations. This will ensure a warehouse location by the same name has not already been set up. Click New to open the New Inventory Location screen.

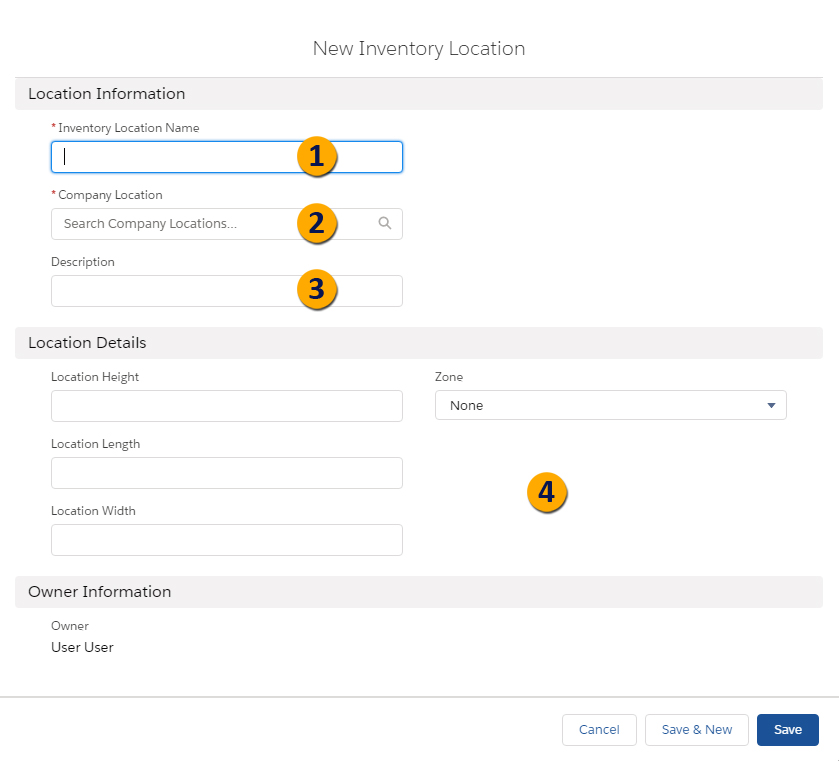
- 1Inventory Location Code Provide a short ( 4-6 character) code to identify the location.
- 2Company Location Enter the Company Location ID of the company associated with the location. This is a type ahead/search field and will begin populating as you type.
- 3Description Provide a description to provide more details about the location.
- 4Location Details This section provides size information for the location. This is helpful in determining if received parts will fit in a particular location. NOTE: Zone is not currently used.
When finished entering the desired information, click Save to finish the process.